
Patience is certainly tested daily raising children. Any parent or co-carer will tell you that and we could all work on developing more of it. It certainly is something we are not born with however, true to be said, some people have some patience in some areas more than others.
Well worth the effort is what we can find ourselves saying when we have exercised this virtue but, how do we develop it to a place in our families where it becomes instrumental in achieving satisfaction? I believe it comes with training ourselves to work on all little irritations and small pains we need to tackle adversity. Just think every day we live with being tested, for example being stuck in traffic may seem unbearable but we seem to get through it in the end, snow cold days but we persevere. Here are some of the things we can do to help develop our patience, after all it is only the gifted that can sit down at the piano and play it without ever taking a lesson.
Steps To Patience
- Understand your irritation. Most of us want our own way to get ahead, to achieve, which is not a bad thing; we just have to try not to act out on our urges.
- Identify the discomfort from the beginning. With younger children we tend to see them throw an object or push it to the side, make a noise, teenagers make irritating faces and give us back chat.
- Choose a hobby that requires time to complete. Delayed gratification teaches us the discipline of patience. For example, learning karate or doing puzzles.
- Create purposeful delays talking your children through the time. Start off small and then gradually develop it to be longer. Example, start off with a small pile of things that need to be put away and gradually add to the pile.
- The secret is really giving our children lots of chances to PRACTICE waiting. We must expect as parents ‘as if’ they can control themselves. This expectation plays on the child’s intelligence.
- Most parents are quick to pacify their children. So many time I hear do you want this, do you want that, how about something else? So, slow down your response time, don’t grab something the moment your child demands it.
Good behavior is a two-way street – it involves your child listening and you offering guidance. So how can you find the patience you need to achieve it? Supernanny used this fun way to show Brian and his five-year-old son how to set the stage for positive discipline and good behaviour.
“I really had to think and slow down and put my mind frame into that 5-year-old head – it helped me be patient!”
Bill Dostal
Step 1
Gather up a bowl or bucket and 10 golf balls or small toys (toy cars are ideal).
Step 2
Place the bucket anywhere you like in your back yard and design an obstacle course around it: use your lawn furniture, throw cushions, large toys such as trikes and bikes, your child’s jungle gym – anything that takes your fancy (avoid using potentially dangerous yard equipment). Alternately, play the game at a local playground and use the play equipment as your obstacle course
Step 3
Place the golf balls or small toys randomly among the obstacles, leaving 10-15 feet between each.
Step 4
Blindfold your child and help him to find the golf balls or toys and make his way over to the bucket to drop them in by giving him directions: ‘left’, ‘right’, ‘straight on’ ‘three big steps’ – you get the picture
Step 5
Now it’s your turn to wear the blindfold and let your child guide you!
What your child has learned? He needs to listen carefully! Learn more about how to get your kids to listen.
What you’ve learned That discipline is about clear instruction and guidance – not raised voices and clips around the head! Learn more about disciplining without getting angry.
Copywritten by Jo Frost
Read More

![The blessed bottle is hard to give up for some. For those Parents who started off breast feeding and went on to use a bottle, or those who started out the gate with bottles or for those parents that now use both; the bottle brings much reassurance not just to child but to parent. From […]](https://www.jofrost.com/wp-content/uploads/2017/03/bottle-002-450x285.jpg "The Bye-Bye Bottle Technique")
![Successfully you have trained your child to use Sippy or also known as Beaker cups, you have got rid of the bottles and feel good about the meal plans you have in place. However, your toddler is now also showing keen interest to be more independent wanting to do more for themselves. As mealtimes come […]](https://www.jofrost.com/wp-content/uploads/2017/03/20170320_142031-002-450x285.jpg "The Little Cup Big Cup Technique")

![Children love to be read stories and it truly creates a wonderful experience every time we can introduce our children to the number of rich children’s literature available. Capturing your children’s interest is not just about the easy story we can find to share but, our enthusiasm in how it is read to our young. […]](https://www.jofrost.com/wp-content/uploads/2017/03/20170320_145021-002-450x285.jpg "The Home Story Technique")
![Getting ready in the morning can cause frustration for both parent and child as we hear the all too familiar ‘Hurry up we are going to be late!!’ I can’t do the zip-up, I can’t put the button through, sound familiar? Most parents recognize that life would be a lot easier, especially with 2 or […]](https://www.jofrost.com/wp-content/uploads/2017/03/Buttons-and-Baby-1-450x285.jpg "The 1, 2, Buckle My Shoe Technique")
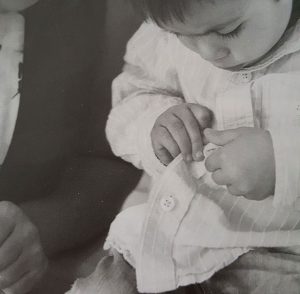 Getting ready in the morning can cause frustration for both parent and child as we hear the all too familiar ‘Hurry up we are going to be late!!’ I can’t do the zip-up, I can’t put the button through, sound familiar?
 ![Somewhere in the later part of the toddler years you will realize it is time to make that transition to their very first big kid bed. However, sometimes parents find themselves eager to make this happen much sooner than necessary. This creates a whole other drama for themselves with the relentlessness of their child running […]](https://www.jofrost.com/wp-content/uploads/2017/03/big-bed-002-450x285.jpg "The Crib to Big Bed Technique")
 Somewhere in the later part of the toddler years you will realize it is time to make that transition to their very first big kid bed. However, sometimes parents find themselves eager to make this happen much sooner than necessary. This creates a whole other drama for themselves with the relentlessness of their child running up and down the hallways and not wanting to sleep.
![Why are parents always so shocked when they go into their child’s room to find every toy out of the cupboard and chaos everywhere? When they are asked to put it all away parents are surprised that a child is asking where does it all go? I have been listening to parents asking their children […]](https://www.jofrost.com/wp-content/uploads/2017/03/tidy-toys-002-450x285.jpg "The Tidy Pile Technique")
 Why are parents always so shocked when they go into their child’s room to find every toy out of the cupboard and chaos everywhere? When they are asked to put it all away parents are surprised that a child is asking where does it all go? I have been listening to parents asking their children to put away their toys and they say I have asked and asked and they still don’t do it. What they don’t realize is they haven’t taught their child how to clean up and take responsibility for their own belongings. In order to do this, you have to make the experience and process simple and fun. Your attitude should generally be one of gratitude because when we can take care of our belongings and make sure they go back into their box and all the pieces are together we earn the privilege to play with it all again tomorrow. The fact is, teaching kids to tidy up is a skill that takes perseverance and patience. Normally at times when we are trying to get dinner ready or baths run is not a good time. It is a skill that is necessary to be taught because it teaches our children to have respect for themselves and others too. So here are a few tips below to start your child off on the right track.


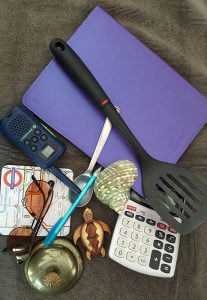
![Patience is certainly tested daily raising children. Any parent or co-carer will tell you that and we could all work on developing more of it. It certainly is something we are not born with however, true to be said, some people have some patience in some areas more than others. Well worth the effort is […]](https://www.jofrost.com/wp-content/uploads/2017/03/patience-002-450x285.jpg "The Patience Technique")